How To Make Amazing Photos Into The Light
A view of the picturesque Arrow River on a winter's day in Arrowtown on the South Island of New Zealand.
Back in the day part of being a good photographer was being able to pre-visualize how your camera and film would record the subject or scene in front of you.
To be able to do so it was important to understand under what conditions camera’s fail, often dismally, to record the scene in the way our eyes and brain see and remember it.
Think of all those times when your subject's face photographs jet black. Perhaps the sky looks great, but your subject has recorded far darker than expected.
It’s important to note that many aspects of identity, including gender, can be lost when photographing into very bright backlight.
An upward view onto a huge, wind blown tree in the Queenstown Gardens in the city of Queenstown, New Zealand.
Except in the case of a deliberate silhouette, as evidenced above, there was just no way I'd photograph into the sun.
That was breaking one of the most basic rules of photography.
Don't photograph into the sun is right up there with those other two gems my mum called out to me as I headed out to do my first wedding as an 18 year old.
"Do you have a hanky?” It wasn't just Bilbo who left home without his pocket handkerchief.
Don't forget to take your lens cap off.
You can imagine what a confidence boost that advice gave me. Particularly as a number of the neighbours were standing out the front of their houses watching me head out.
In retrospect it was one of those watershed moments. A kind of ritual where I was heading out into the world, no longer as a child.
I had to grow up and take control of the situation. And I had to do it NOW!
Looking back down a narrow pier towards beautiful Autumn color on Lake Wakatipu, Queenstown, New Zealand.
New Technology Creates A New Reality
The good news is that the days of not being able to photograph directly into the light are gone, or at least they can be with the right techniques.
Photographing towards the sun, in a way that doesn't cause the darker foreground to render as black, is now possible. Here are the options available to you.

About to Travel?
Why I Moved From Canon To A Nikon D800e
I made the above photo with a Nikon D800e camera and a Nikon 12-24mm f/2.8 lens.
At that time I believed that camera represented a revolution in DSLR photography, previously only available in medium format digital cameras.
The Nikon D800 and D800e cameras incorporate a sensor that is capable of recording subtle highlight texture and, at the same time, maintaining detail in very dark shadows.
At the time this technology provided the ability to photograph under much higher levels of contrast (i.e., dynamic range) than was possible with any other 35mm-like DSLR or mirrorless camera.
Nowadays there other other cameras, particularly from Sony and Nikon that have further extended your ability to photograph under high contrast conditions.
I currently use a Sony a7RII camera.


I Love Lightroom | It Just Gets Better And Better
Version 4 of this fantastic product introduced controls within the Basic panel of the Develop Module that provide amazing control over the lighter and darker areas of the image.
A significant improvement on its predecessor, Version 3, the Highlight and Shadow sliders are fantastic tools for aspiring and professional photographers alike.
More recently the arrival of Lightroom CC introduced a great new HDR feature. It's simple to use and produces excellent results.
More experienced operators may wish to avail themselves of the pathway between Lightroom and Photoshop which provides the ability to Tone Map their images, in 32Bit no less, and thereby be able to further their control over high contrast situations.
A picturesque lake framed by an overhanging tree at Queenstown Gardens in the city of Queenstown, New Zealand.
How About Trying This Popular HDR Workflow
We can describe a HDR workflow as a series of exposures combined into a single, composite image.
For optimal results, so as to avoid an out of register composite, a tripod is recommended.
The idea is to make a series of images, ideally of a stationary subject or scene, at different brightness levels. This procedure is commonly known as Exposure Bracketing.
You might make 3, 5, 7 or even 9 images of the scene, depending on the contrast inherent to that scene. The distance between each exposure is likely to be 1 or 2 stops.
Most folks make an overall exposure of the scene, with their cameras set to Matrix/Evaluative or Centre-Weighted Averaging metering (I prefer Spot metering).
That becomes their base exposure to which they add darker and lighter exposures.
It seems that most folk make a series of 3 exposures at 2 stop intervals. Let's say your base exposure was 1/125 second at f/8 with an ISO of 100. Here's what you'd end up with.
1/500 second at f/8 ISO 100 equalling a MAR - 2 stop exposure
1/125 second at f/8 ISO 100 equalling a MAR (base) exposure
1/30 second at f/8 ISO 100 equalling a MAR + 2 stop exposure
The textural elements within this stand of winter trees in rural Otago, New Zealand make for a lovely study in composition.
Fantastic Tips To Make Great HDR Photos
The term MAR stands for Meter As Read. It refers to the way light meters work by measuring the brightness of the scene and adjusting Shutter Speed and/or Aperture (and, in some cases, even ISO) to achieve a mid tone rendering of the scene.
This is extremely problematic, particularly when the scene is made up of predominantly light (e.g., beach, snow, wedding dress) or dark (e.g., close up of dark tree trunk, dark skinned person) subject matter.
Trusting the cameras light meter to produce a correct exposure is often folly. And that's as true today for those setting their camera to RAW or JPEG as it was in the days of film.
It's not until we accept this fact and understand when and how to override the camera's built in light meter that we are in control of exposure.
High contrast introduces other concerns, which is where HDR comes in. But, other than that rather bold statement, this is a complicated topic best left for another day.
Whether your camera produces the 3 separate exposures (-2, MAR and +2) in the order described or, for example, as a MAR, -2 and +2 sequence is dependent upon the camera in question or, if it offers the functionality, the order in which you program the camera to record each exposure.
Of more importance are the amount of exposures and the difference in brightness between each one.
If you're very keen on HDR make sure you have a camera that provides you with a lot of control over the process.
A narrow, wooden pier over the waters of Lake Wakatipu in Queenstown, New Zealand.
The Best Exposure Mode For HDR
What's critical in HDR photography is to ensure that it is only the Shutter Speed that changes from one exposure to the next. (This is yet another good reason to avoid your camera's Shutter Priority mode).
Changing the aperture will often result in different levels of Depth of Field (DOF) in each image. And that would be problematic when trying to assemble the composite image.
The best exposure mode for HDR photography is, therefore, Aperture Priority (i.e., A on a Nikon or AV on a Canon).
Why It’s Best To Avoid Auto ISO For HDR
Likewise, having your camera set to Auto ISO might cause the camera, under low light conditions, to increase the ISO for your plus (MAR +) exposure.
That might result in a variation in noise from image to image which might, conceivably, cause problems when producing the composite HDR image.
My recommendation would be to turn the Auto ISO function in your camera off.
If you feel the need to change the ISO for one or more of the images in the sequence, so as to minimize the chance of movement during the longer MAR + exposure/s, it might be better to re-set the Auto ISO just for that particular scene.
Please be aware that suggestion is opinion based and your choice to follow, if and when the need arises, or not.
Manual Focus Is Recommended For HDR
It's important to set your camera/lens to Manual Focus to avoid it refocusing from frame to frame. The last thing you want is an out of register composite image.
A narrow path leads through a stand of pine trees on the outskirts of Queenstown in Otago, New Zealand.
Popular Software For Awesome HDR Photos
Once you have your images imported into Lightroom select the sequence in question and either choose to use Lightroom's built in HDR feature or, alternatively, open them into a HDR software package.
Some of the most popular HDR applications are Aurora HDR 2019 by Skylum (formerly Macphun), Nik Software HDR Pro 2 (purchased by Google in September 2012) and Photomatix Pro.
It’s important to note that the HDR option built into Lightroom is designed to produce a relatively straight Tone Mapped composite image, providing more detailed highlights and shadows than would be possible with a single exposure.
In addition to producing a Tone Mapped composite the other applications mentioned above also provide the option to apply one of a range of looks or presets to the final image.
While you have considerable control over just how processed (e.g., relatively realistic, artistic, or down right freaky) that image becomes it is likely going to be quite different in appearance to any of the original camera-generated files.
This is neither a good nor a bad thing. However, I feel it's good to be aware that the look and feel of your image will change in most HDR applications.
The idea then is to ensure that you choose an option that takes your HDR composite image in a direction you want it to go.
A little boat floats peacefully on Lake Wakatipu in Queenstown, New Zealand.
As mentioned earlier a very successful Tone Mapped composite image can now be achieved via the Lightroom 4.1 (or higher) to Photoshop CS6/CC return pathway.
Simply select the files in Lightroom, bring them into Photoshop to produce the Tone Mapped composite image, ensuring that the 32 Bit option is turned on and no presets are selected, prior to saving them back into Lightroom, as a single composite Tiff, for further processing as required.
This is an option I've been using for a number of years. I like it as I believe it best maintains the integrity of the original camera generated files.
However, there are times when the results from my usual HDR workflow fails to deliver the required wow factor.
In those circumstances I find that Aurora HDR 2019 saves the day.
Clouds illuminated at sunset above Lake Wakatipu in Queenstown, New Zealand.
How We Managed Contrast In The Good Old Days
Back in the day we'd deal with high contrast situations in a range of ways including the following:
Wait for the weather to change or come back at a different time of day and/or different time of year
Framing, which I still employ, to exclude very bright and/or very dark areas from the frame
Placing a diffuser between the light and the subject to both soften and reduce the brightness of the light on the subject and, as a consequence, reduce the intensity and hard-edged appearance of the shadows
The use of a reflector or flash to reduce the difference between a dark foreground and a much brighter background
Deliberately over exposing negative/print film, to lighten shadows, and then under developing to reduce the brightness of the highlights
Any number of dodging, burning and print processing procedures to reduce contrast and direct attention to important focal points within the frame
These days it's possible to deal with the devil that is high contrast, in camera, through some of the methods described above and/or through a combination of camera and software applications as follows:
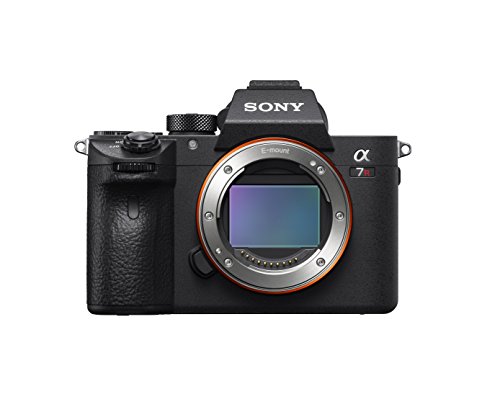
The amazing Sony a7R III camera
Employing Lightroom, either on its own or in conjunction with Photoshop CC 2018
With a dedicated HDR software application such as Aurora HDR 2019.
The choice is yours and the options available to you are incredible. There's even an iPhone app that creates a pretty reasonable HDR result. Strewth!
There you have it. These are some of the reasons why this really is the Golden Age of Photography.
So, why fight it? Get up, get out and get to it. Photography is life, as we experience and remember it.