Simple Portrait Photos: How to Make a Great Pic in 2 Minutes
Environmental portrait photo of photographer, Torsten Henn, in spectacular Iceland.
Every wondered how to make a portrait photo in two minutes or less. This post features a simple, yet authentic candid moment between my niece, Rachel, and her firstborn child, Ashton, in their home in suburban Melbourne.
To make portrait photos in under two minutes place the subject into soft light, use a shutter speed that'll prevent subject movement and camera shake, employ a shallow depth of field for visual separation, ensure the background is similar in brightness to your subject and simplify posing directions.
With this information you’ll be able to make portrait photos, wherever your travels take you, quickly and efficiently.
It’s basically how I go about making portrait photos as a travel photographer, so I can recommend this workflow to you with confidence.
But do read on, as there’s always more to learn.
You see, while technique and an efficient workflow is important, there’s much more to making great portrait photos than a simple recipe.
As a starting point, let’s explore what’s going on in this environmental portrait photo of photographer and tour guide, Torsten Henn, in the Highlands region of Iceland.
Table of Contents:
Make Portrait Photos That Tell A Story
I was in Iceland, running a photography tour, when I made this photo. Torsten, the chap pictured, was working as a driver and guide for a local tour company that had been engaged to get our group, from one scenic location to the next, as we journeyed around the south of Iceland.
Torsten was a nice guy and, after a number of years living and working in Iceland, he was about to marry and travel the world.
When we got to this particular spot in the Highlands region of Iceland, I thought it would be great to make his photo as a memento of the time he’d spent in this most remarkable country.
It’s important to acknowledge that the subject or scene depicted in a photo will be so much stronger when there’s a story involved.
In this case the story being told is of a man, confident and at ease in the landscape.
It’s a pretty straightforward tale, but there’s no reason for it to be otherwise. What’s more, it’s a story that I found to be worthwhile telling.
Now the story that’s explored in your photos can be quite literal, like a day at the races or a child’s first day at school.
Alternatively, your photos might take a more subtle, suggestive approach to storying telling through the use of theme or metaphor.
Window light portrait photo of actor, Rachael Taylor.
Lighting Portrait Photos: Two Primary Choices
Long ago I operated a wedding/portrait studio. During that time I photographed around 250 weddings, over 100 family portraits and numerous assignments involving schools, kindergartens and debutant balls.
None of these jobs were easy and I worked tirelessly in an effort to control a wide variety of difficult situations through smooth, highly organised and technically controlled work practices.
However, despite the very best of intentions, the reality of the day would present unexpected and, often quite unique problems.
With time, weather and extenuating circumstances conspiring against you, there’s no option other than to adapt and find solutions to get back on track, in a way that keeps your customers calm and confident in your ability to resolve the situation.
The great lesson here is to be as organised as possible, while staying flexible and adapting to changing circumstances.
That’s the reality of a professional photographer, particularly when you’re working on location.
A lot of studio based photographers prefer the control that comes with working in an environment they know and can control, which includes the use of artificial studio lighting.
I never did.
I found portrait studio environments, including painted and paper backgrounds, to be artificial and the images that resulted to be contrived.
What’s more, when photographing little kids, their dad’s always seemed on edge. No doubt they were worried about their kids getting hurt, knocking into expensive studio lighting, and the potential financial cost incurred in doing so.
Worse still, the hassle involved in bringing studio lighting out on location.
I know of professional portrait photographers who do it, but it’s hard to manage all that extra gear on your own. I’ve worked very successfully with assistants in the past, but I prefer working alone.
That’s because the creation of beautiful portrait photos requires trust and a certain level of intimacy, that’s much easier to establish and maintain when there’s no one else looking on, particularly a stranger who doesn’t share the same level of commitment to the process as you or the bride.
While I’ve made lovely portrait photos in a family home, with the aid of studio lighting, more often than not there just wasn’t the room to set up the lights where and how I wanted to.
Needless to say, it’s a very rare day for a bride to be on time on her wedding day.
Fine, but that delay can substantially reduce the time the photographer has at the bride’s house to make beautiful and meaningful photos.
What’s more, losing even more time packing up studio lighting and moving furniture around, all in a suit and tie, can create a cascading degree of pressure for the photographer.
As a result your well thought through plans become a mad rush to pack everything up, get back to the car and find a park at the church in time to meet the groom, groomsmen and minister and, finally, get into position to meet and photograph the bride as she arrives at the church.
I tell you, it can be a nightmare. One that, through no fault of your own, reoccurs week after week.
You’re probably thinking, why not push everything back and get to the house 30 minutes earlier?
Unfortunately, brides often book hair dressers before photographers. What’s more, for a variety of reasons, brides are often kept late at hairdressers.
And there, your honor, is where it all started to go wrong.
A much better option, when making photos at the bride’s family home, is to be able to work with the light that’s available to you. Here’s what I learned to do:
Make portrait photos, indoors, with the use of window light.
Photograph outside, in the garden, often in the soft light of open shade, creating relaxed and technically beautiful photos of the bride, bridesmaids and the bride’s family.
This way of working allowed me to be on my way, usually within a minute or two after making my last photo. I’d be in the car in a flash and on the way to the church, leaving sufficient time to achieve the following:
Park the car at the church.
Greet and photograph the groom and groomsmen.
Get into position to meet and photograph the bride and her father, as they alighted from the car and prepared to enter the church.
Move into the church and get into position to photograph the bride as her father escorts her down the aisle.
Of course, this philosophy goes beyond wedding photography. I’ve taken the very same approach to making portrait photos when working as a film stills, newspaper and travel photographer.
The photo of actor, Rachael Taylor, was made on a film set in the city of Mildura in rural Australia. We were just about to commence filming a scene, in and around a house in a picturesque orange grove.
While the crew was setting up I asked Rachael to lie on the bed and look out the window, towards the light. Doing so is a great way to suggest thoughts of a life that’s either not being lived or beyond the reality of the person depicted.
The violin and bow are prompts that were important to Rachael’s character in the film.
It’s a straightforward image that utilizes what’s probably my favorite light source: window light. It’s a soft, flattering light which is great for making portrait photos.
When it comes to making beautiful, life affirming portrait photos it’s always important to remember that the word photography, which comes to us from Ancient Greek, translates as follows:
Light writing
Light drawing
Light painting
As a way to further understand the essential relationship between light and photography it’s worth noting the following:
Light illuminates, revealing subject identity (e.g., gender, age, clothing, expression and gesture).
The absence of light creates shadows, and shadow creates shape and a sense of mystery.
Light also has the potential to imbue the image with a sense of other worldliness, providing the viewer with a glimpse into realities that may exist, somehow, beyond our normal, everyday experience.
It’s critical to understand that, without a sense of light, an otherwise sharp and well exposed portrait photo can look flat and uninteresting.
That said, pay attention to light when you’re out and about, and be able to understand the difference between hard and soft light in the environments in which you find yourself making photos.
I just can’t overstate the need to be able to quickly and efficiently identify soft, flattering light and to move your subject into that light when you’re looking to make great portrait photos on location.
Black and white portrait photo of a yogi resting in Kolkata, India.
How To Choose A Background For Portrait Photos
The next step to ensure a good location to situate your subject for a portrait photo is to choose an appropriate background.
Usually that will require a simple, uncomplicated background so as not to draw attention away from your subject.
In the case of this yogi, resting in temple grounds by the banks of the Hooghly River in Kolkata, I was faced with high contrast lighting and an unattractive and quite visually complex background.
Opting for a black and white version of the image enabled me to draw attention away from the background, as the dark green leaves rendered as very dark shades of gray.
Dappled light, while beautiful to behold, is notoriously difficult to photograph.
Fortunately, all I had to do was to gesture to the yogi to lean forward, so that his face was illuminated, in the knowledge that, by doing so, much of the surrounding area would record darker in the photo.
While it’s quite an untidy composition, it’s very real and I’m really glad I made it without asking him to move into more even lighting. Getting him into exactly the right position so that his face was illuminated, but he wasn’t made uncomfortable in the process, was harder.
Still, I managed to complete the whole process in under two minutes, which was a great outcome for both of us.
As a rule, you’ll find your life as a photographer will be made easier when you can ensure the background is of a similar brightness to your subject.
That’s because a background that’s significantly brighter or darker than your subject can cause your camera’s light meter to produce a poor exposure.
For example, a much brighter background will likely cause your subject to be recorded very dark, quite possibly as a silhouette.
While there are ways to overcome this kind of problem, the whole point of this post is to provide information that will enable you to be able to make great portrait photos in under two minutes.
To be able to achieve this goal you don’t want to have to be spending time messing around with camera exposure, fill flash or, with the help of a competent assistant, a reflector.
What’s needed is to situate your subject in soft light, ensuring the background is of a similar brightness. Doing so will reduce the dynamic range of the scene and enable your camera to produce a great exposure, more often than not.
Incidentally, it may be that the environment you find yourself photographing in doesn’t provide a particularly attractive background.
Don’t worry I’ve written an informative post titled How to Deal With an Ugly Portrait Background that outlines a range of practical and actionable tips to deal with that problem.
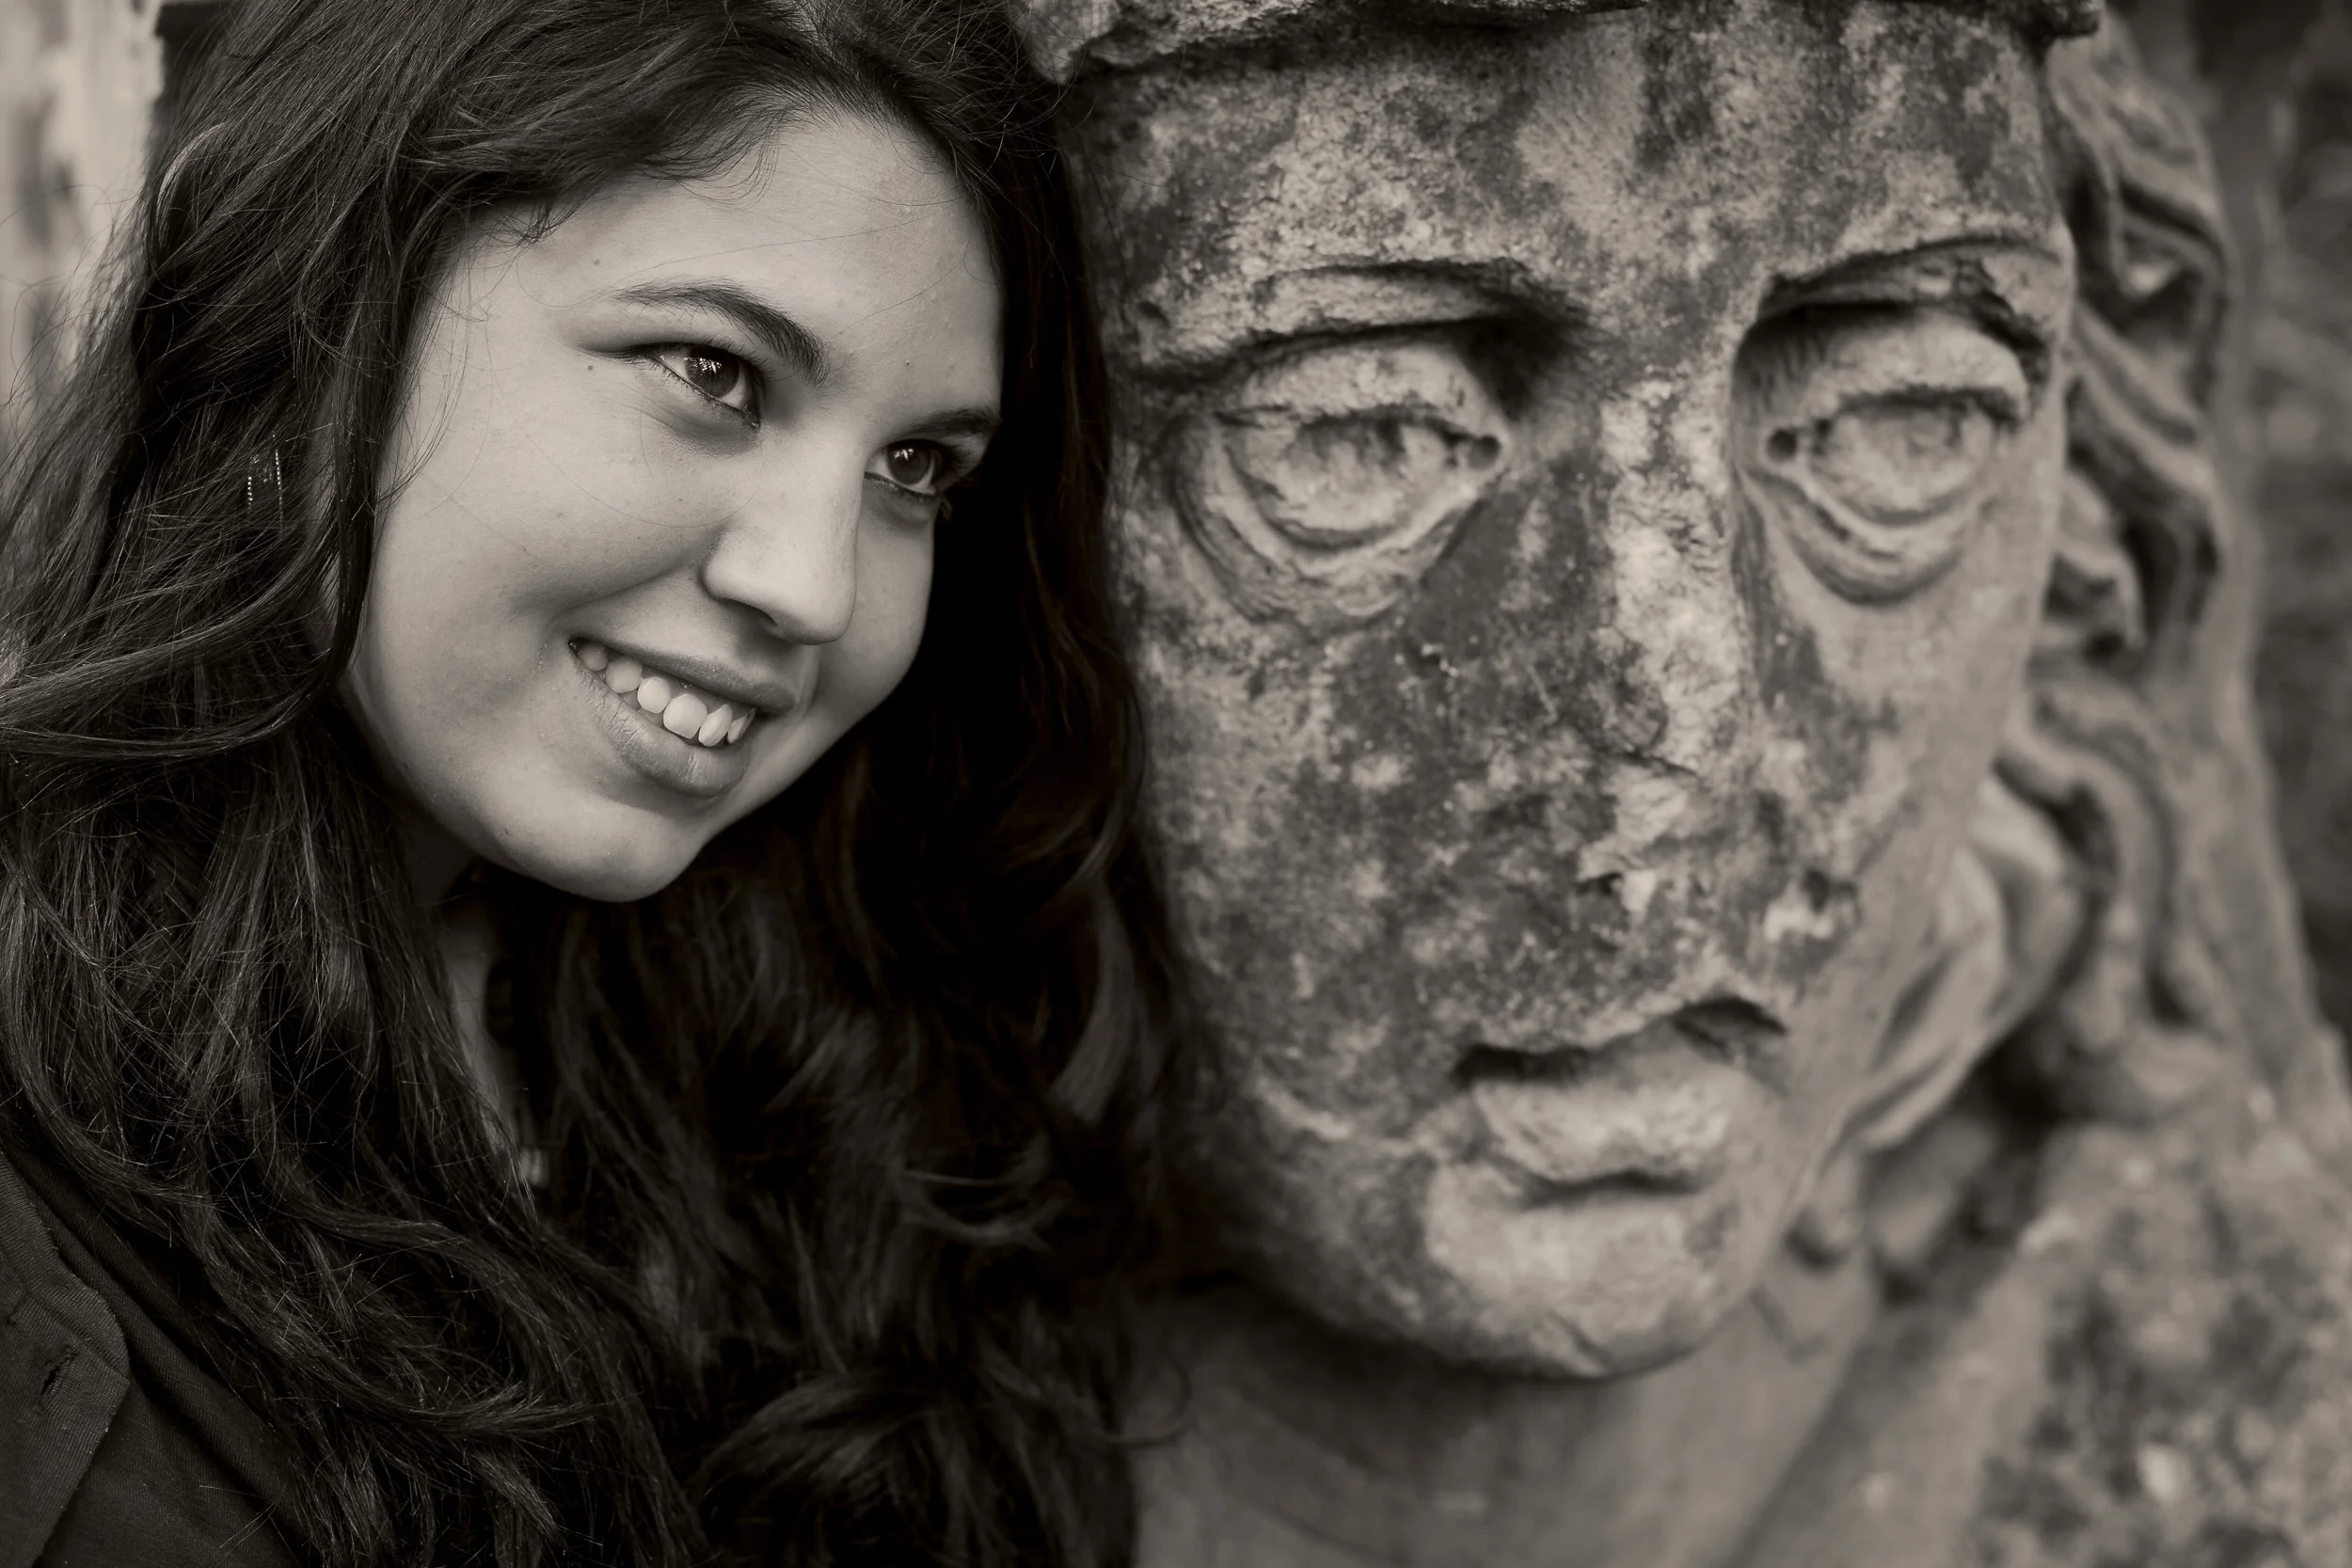
Portrait photo of a young man and a statue in Eltham, Australia.
Depth of Field in Portrait Photos
I’ve written extensively on this site about the topic of depth of field. It’s such a critical tool for the creative photographer, whether you’re primary interest is making portrait, landscape, wildlife or architectural photos.
As a travel photographer I get to photograph a wide and varied range of subject matter depending upon where my travels take me and the photography projects I’m undertaking.
Needless to say, expertise in the application of depth of field is of critical importance in the photos I create. In fact, I’m always conscious of it, each and every time I make photos.
To gain a thorough understanding of depth of field, and how to apply it in your own photography, I strongly recommend you read the post I created titled Depth Of Field: How To Make Professional DOF Photos With Ease.
Having said that, it’s reasonable to say that an aperture of f/4 is a good starting point to achieve a suitably shallow depth of field for most portrait photos featuring one or two people, given the cameras and lenses most folk use these days.
That was the aperture I employed to make this black and white portrait photo of a young man, position slightly in front of a statue, at an artists retreat in Melbourne, Australia.
The visual compression that’s evident between the young man and the statue is a result of the photo being made with a mid strength telephoto lens. In this I achieved the effect with my lens zoomed into a 105 mm focal length.
Doing so has visually reduced the distance between them, compressing the image and, in doing so, introducing a subtle tension into the photo.
But again, to really understand depth of field and how to apply it in your own photography, do take the time to read the post I’ve linked to above.
Achieving Critical Focus and Image Sharpness
Needless to say, when it comes to creating beautiful, engaging portrait photos, it’s important to critically focus on the primary focal point of your photo. In this case that’s the young man’s right eye, the one that’s closest to the camera.
This kind of critical focus helps ensure the viewer’s attention is concentrated where you want it to be.
The viewer’s eyes will wander around the picture, because that’s how our eye and brain work to gather information, but they’ll always be drawn back to that critical point of focus.
With that said, always ensure that your camera’s lens is focused upon the primary focal point in the portrait photos you create.


Composition In Portrait Photos
To achieve a visually interesting photo construct the image in a way that uses elements of composition such as tone, line and shape, and check that the resulting shutter speed will be fast enough to avoid camera shake or subject movement.
Now all that’s needed is good timing to achieve what’s referred to as the Decisive Moment: the exact moment when all the technical concerns, composition, subject expression and gesture come together to make a great portrait photo.
Portrait Photos: How To Assess The Exposure
Once you’ve made a few photos there’s two things you should do to determine your success, thus far.
Checking the histogram is an objective way by which you can assess the exposure of the photos you’ve just made.
Being able to read a histogram is useful, particularly if you’re using a DSLR camera outside on a bright day and light, reflecting off your camera’s LCD screen, is making it hard to properly view the photos you’ve made.
Needless to say, by moving into the shade or turning your back to the sun, it should be easier to see the images displayed on your camera’s LCD display.
One of the great advantages of many mirrorless cameras is that, in addition to an LCD screen, you can see the image you’ve just made by looking at it through your camera’s viewfinder.
What’s more, you can toggle, back and forwards, through all the images on your camera’s memory card by previewing them through your camera’s viewfinder.
Just be aware that this fantastic feature may not be operational out of the box. You may have to dig into your camera’s menus to turn it on.
Being able to use this feature, while looking through a mirrorless camera’s viewfinder, makes it easier to make a relatively accurate, albeit subjective, assessment of an image’s exposure, sharpness and composition.
I’ve found it to be far more accurate and more convenient than trying to do so by looking at the image, displayed on an LCD screen, after the fact.
Portrait Photo Keepers
Once you’ve made one or more images that you’re happy with, sometimes referred to as keepers, you’re now free to create more photos in a more relaxed and, potentially, more creative fashion.
Make a few more exposures concentrating on the moment being explored and then move onto other locations and, perhaps, even better opportunities for great portrait photos.
Just remember, working quickly helps keep the moment candid and real, and the subject of your photo relaxed and cooperative.
Candid portrait photo of my niece, Rachel, and her firstborn child, Ashton.
Conclusion: Final Thoughts On How To Make Portrait Photos
Making simple portrait photos is so easy, once you know how to. The method I’ve outlined throughout this post is straightforward to follow and will become relatively automatic after you’ve done it a few times.
Speed is important. It’s what keeps your subject relaxed and in the moment, rather than becoming concerned by you continually messing around with your camera gear.
Needless to say, speed is your friend when it comes to creating authentic candid portrait photos.
Likewise, a basic understanding of light and how to use your camera to achieve accurate focus, an appropriate depth of field and a good exposure will enable you to quickly conquer technical concerns.
With the growing level of confidence that will follow you’ll begin to concentrate your attention on composition and making more creative images, more often.
I made this photo of my niece, Rachel, and her firstborn child, Ashton, with the aid of window light after traveling to their home in suburban Melbourne, Australia.
The photo showcases a tender moment between mother and son.
While it’s a visual document recording the two of them at home, at a particular stage in their lives, the photo displays a more iconic moment that explores the relationship between mother and child, what it is to be dependant and what it is to care for someone dependant upon you.
The photo is about early childhood, and it’s also about parenting.
By the way, I wasn’t worried after Ashton dribbled on his mum’s tee-shirt. Nor did I ask Rachel to change her top, as it would have taken the two of them out of the moment.
Frankly, as this wasn’t a professional photography assignment, I just didn’t see any reason to do so. There’s a certain authenticity to the image, just the way it is.
Likewise, I decided not to retouch the dribble marks during post processing.
Doing so may have improved the result, but given this post is all about making simple portrait photos in less than two minutes, it didn’t seem right to do a whole lot of extra work on the computer.